03 Nov 2016 on web and iot
Web control panel for Neopixel
Connecting a Neopixel LED ring to the web browser for various displays
Recently, I fell in love with the simple RGB LED 💡
I love connecting physical things and displaying them on a web browser! So I thought of getting the Neopixel ring and displaying different colored lights and patterns through the control of the web interface. Here are some steps to make that...
What we need
- 60 LED Neopixel ring + USB cable
- Arduino + USB cable for power
- Jumper wires
470Ωresistor1000uFcapacitor
Assemble the Neopixel Ring
- Get the 60 LED Neopixel ring as 4 pieces of 15-pixel quarters

- Refer to the detailed Adafruit's guide on Neopixel
- Solder 3 out of the 4 joints from
GNDtoGND,DINtoDOUT,5Vto5V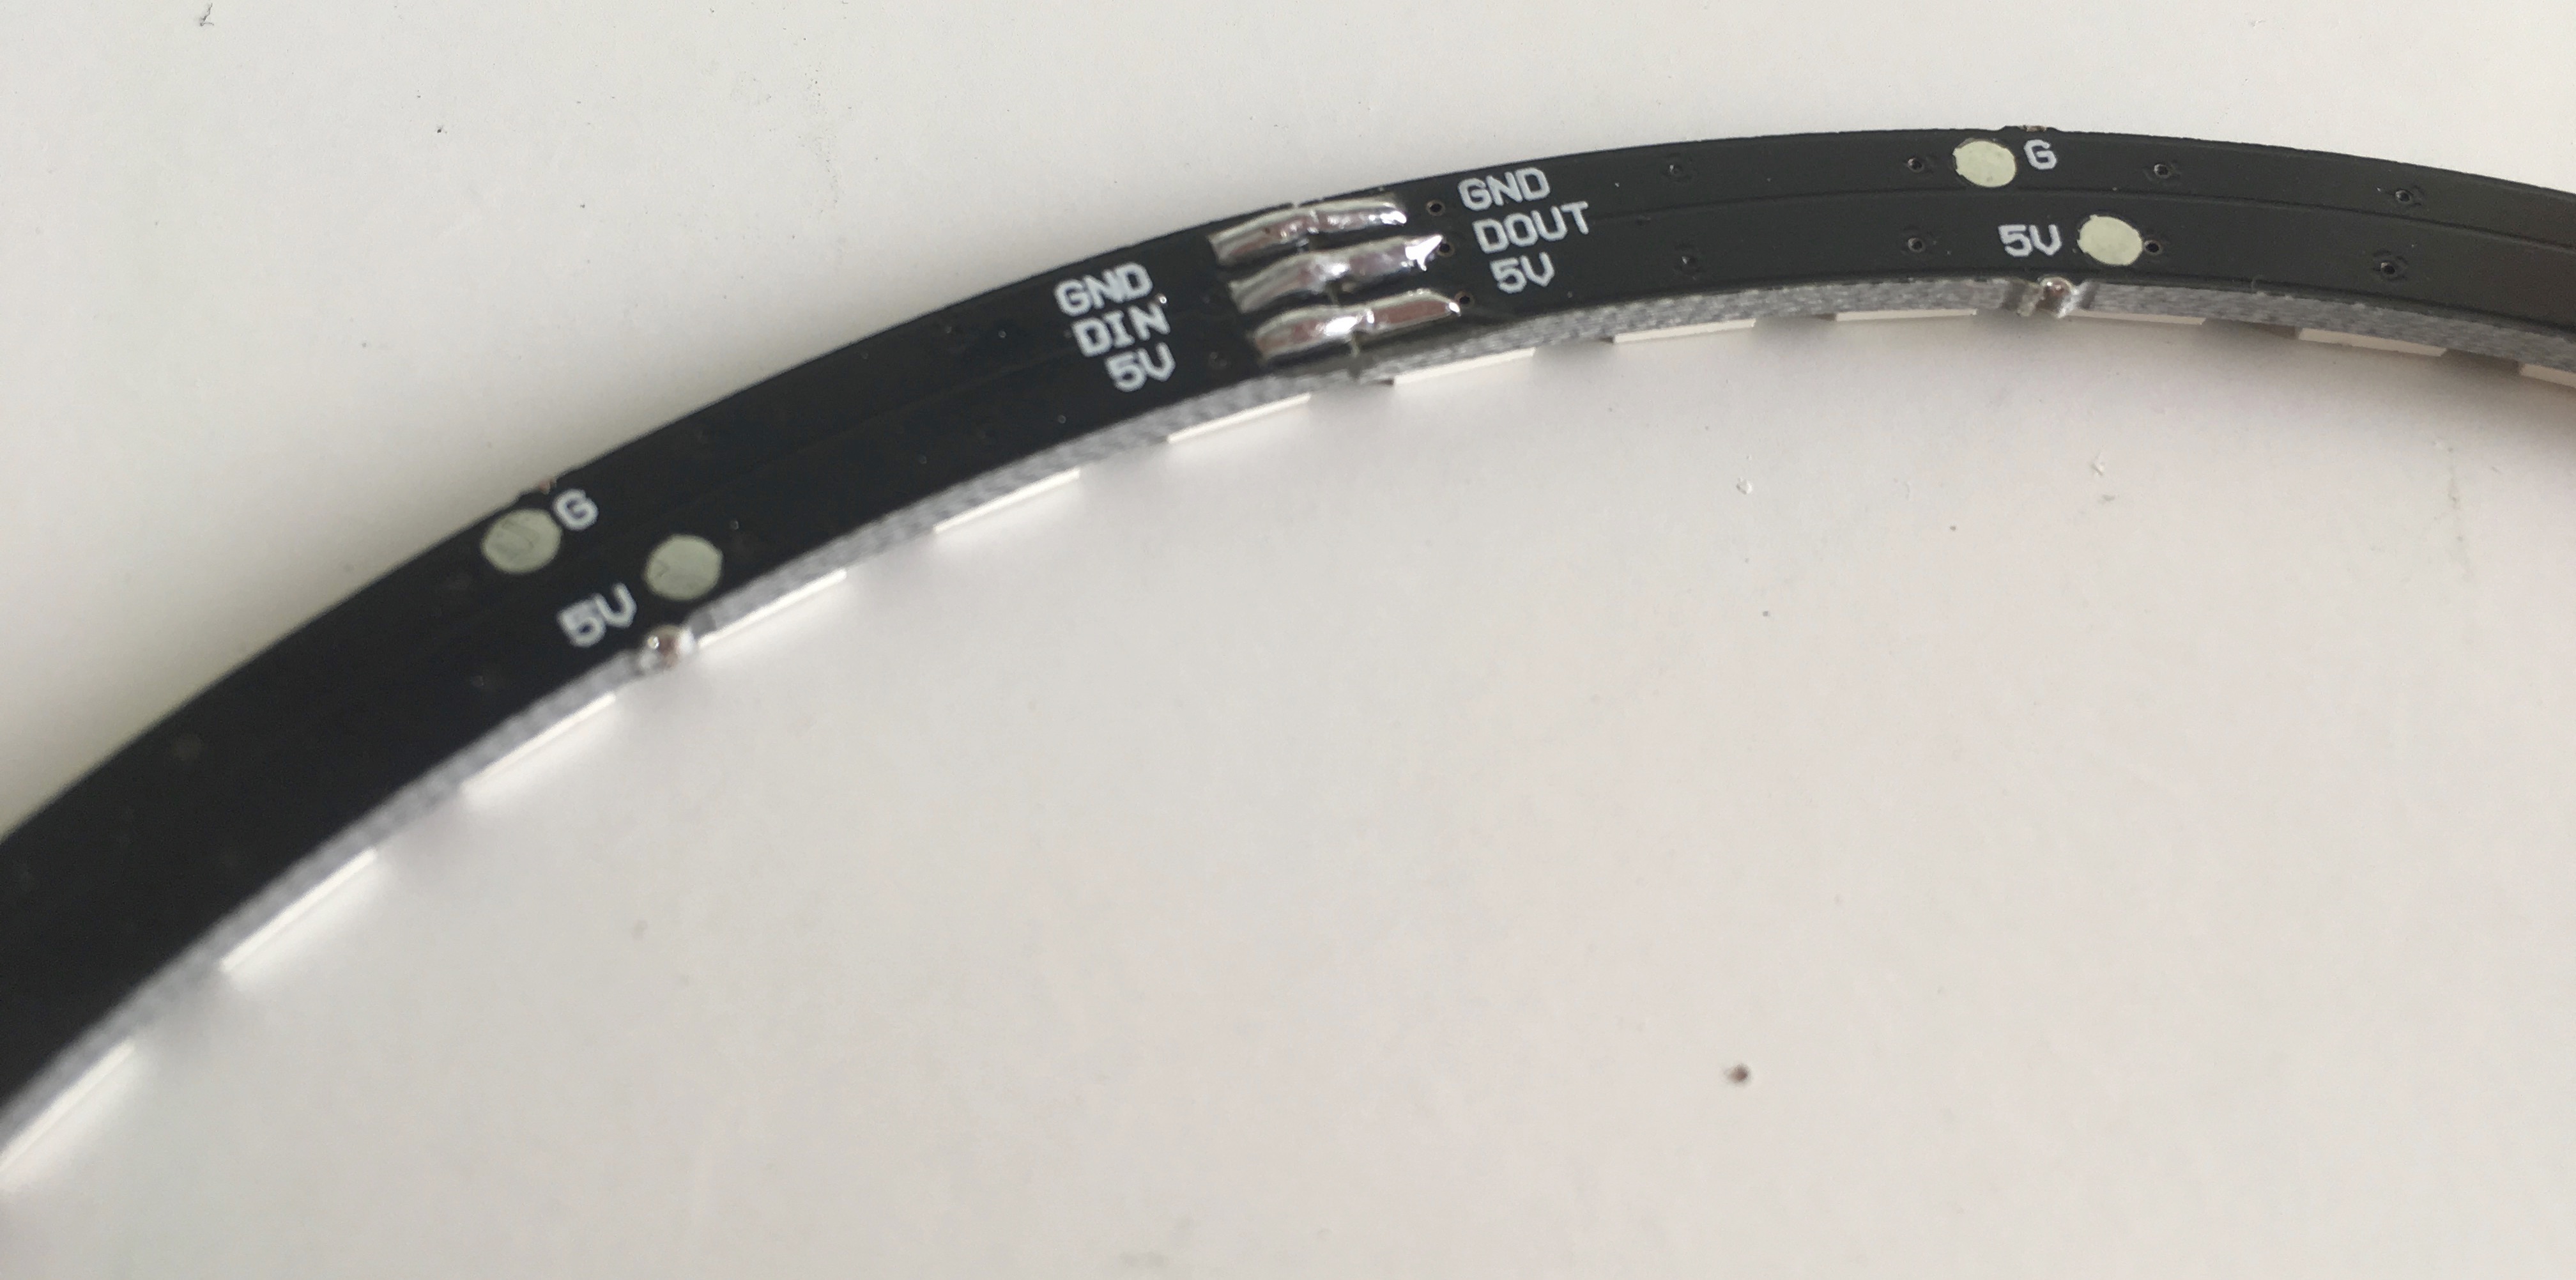
- Solder
GND,DINand5Vto 3 wires at the 4th (last) joint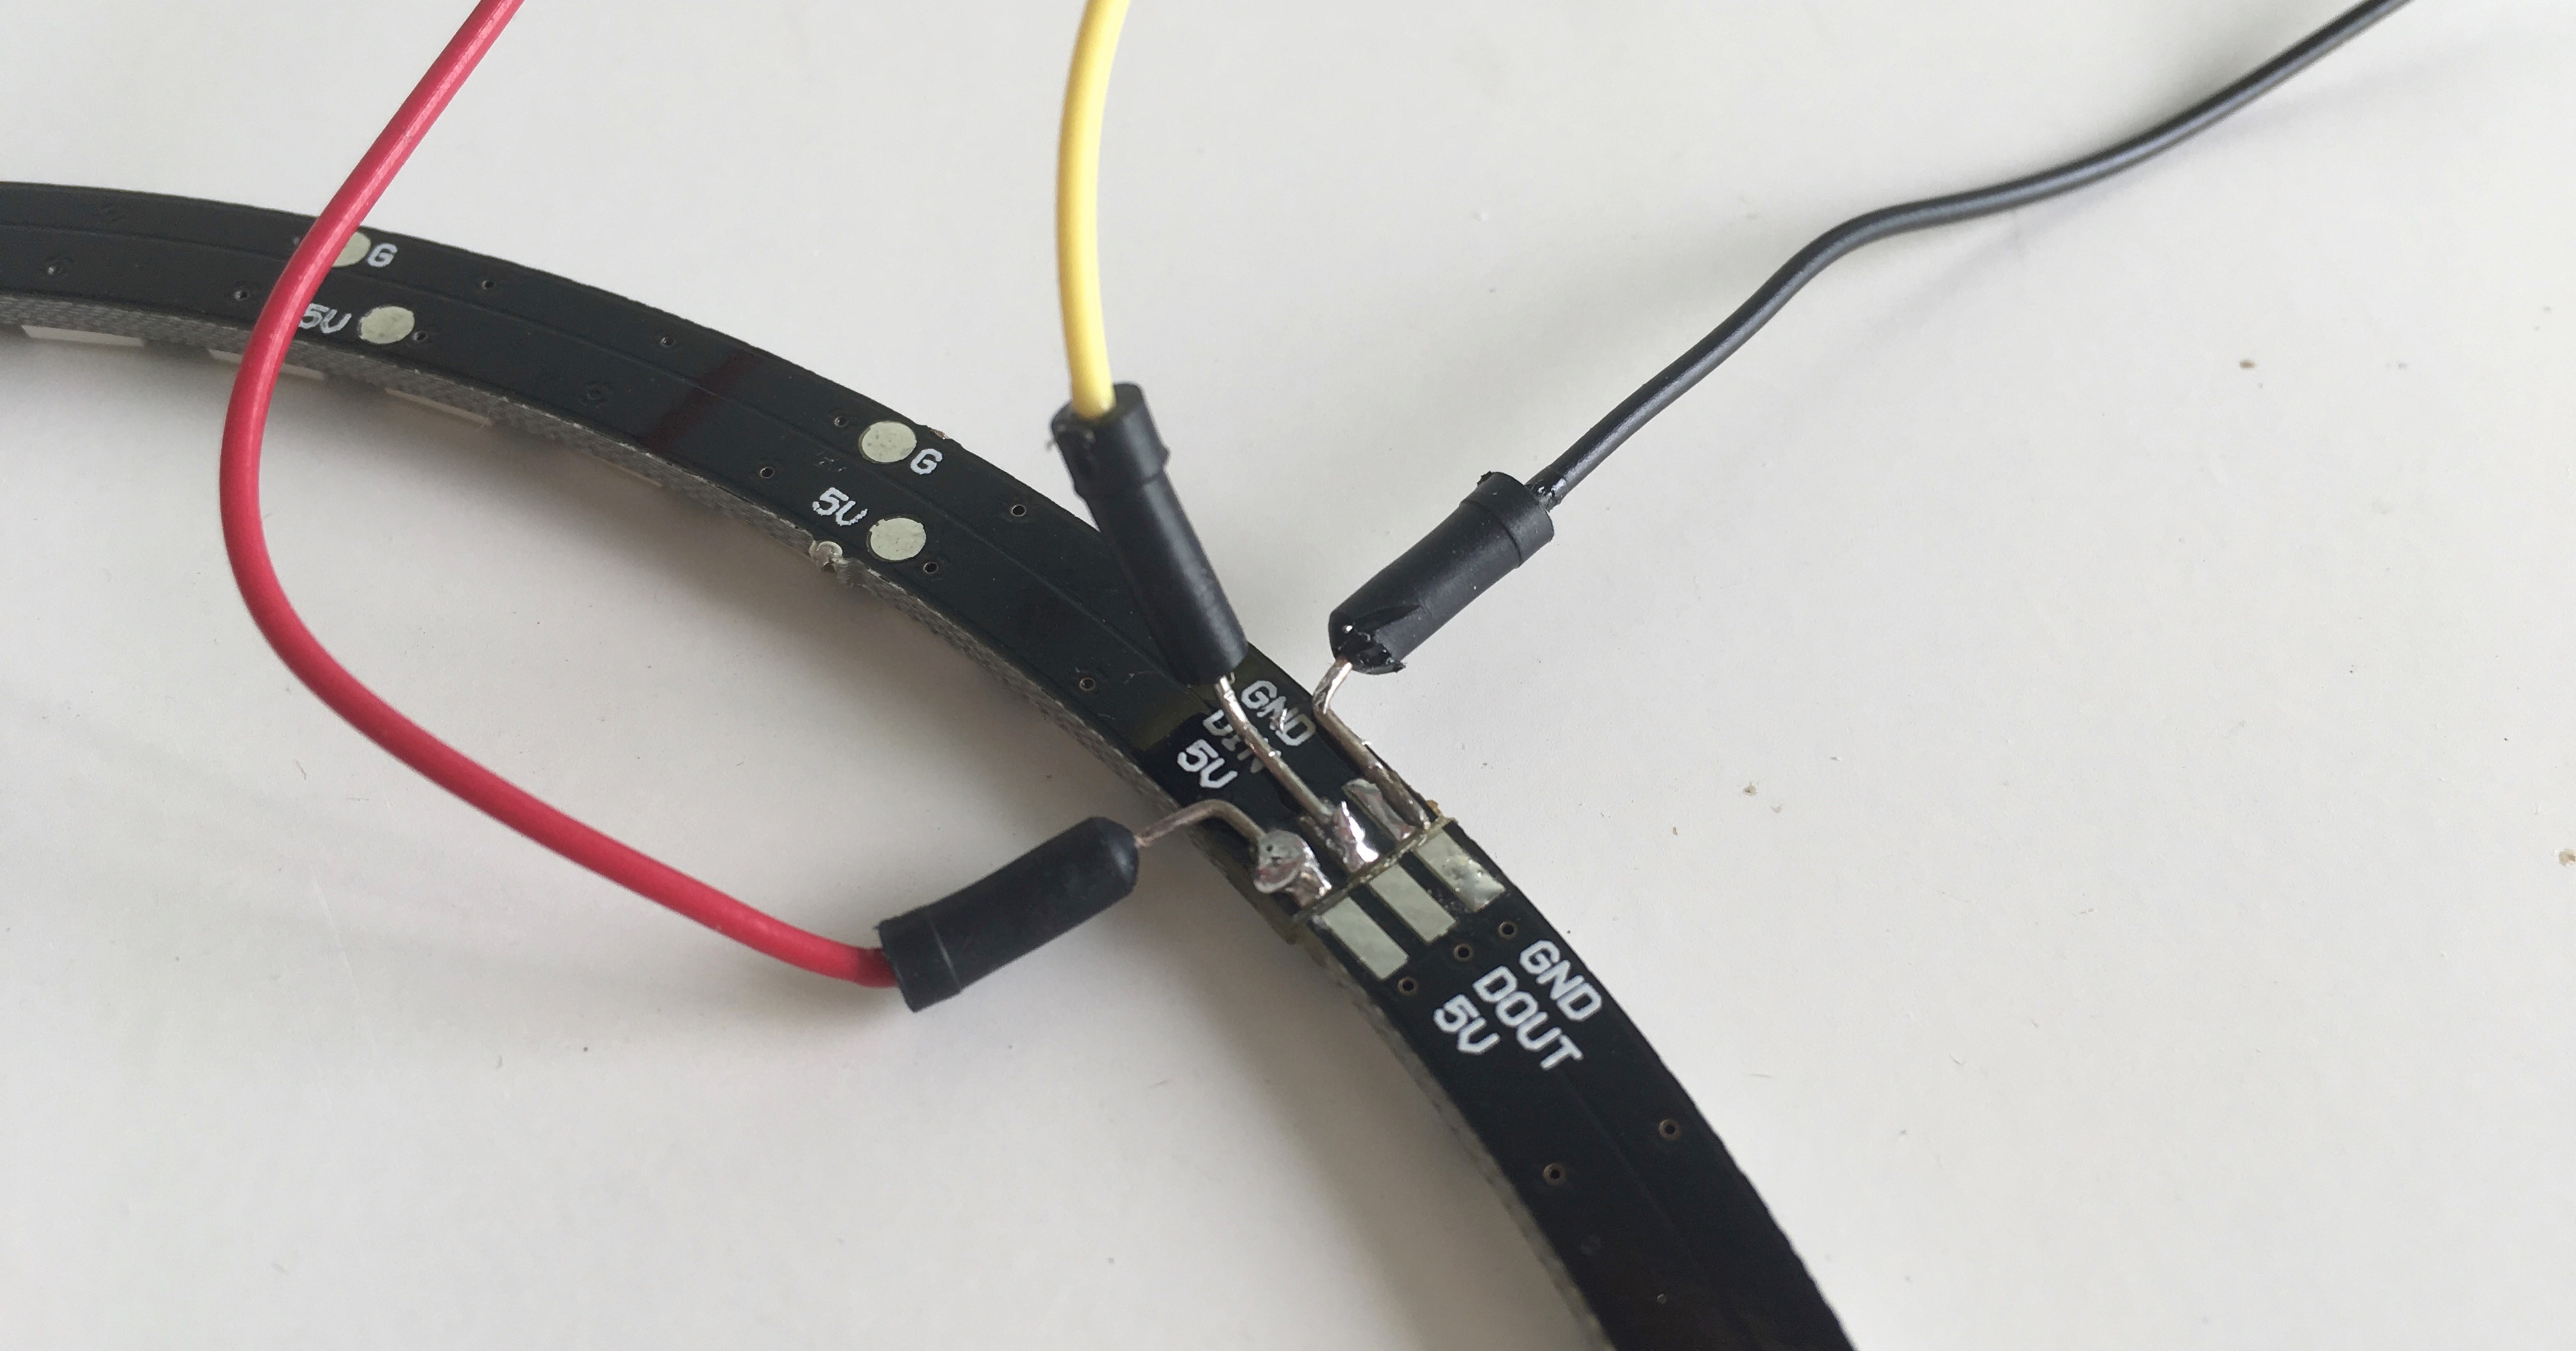
- Create a USB cable with 2 wires sticking out at the other end by striping of the wires at the end. This will provide
+5V DCfrom a power supply to the Neopixel.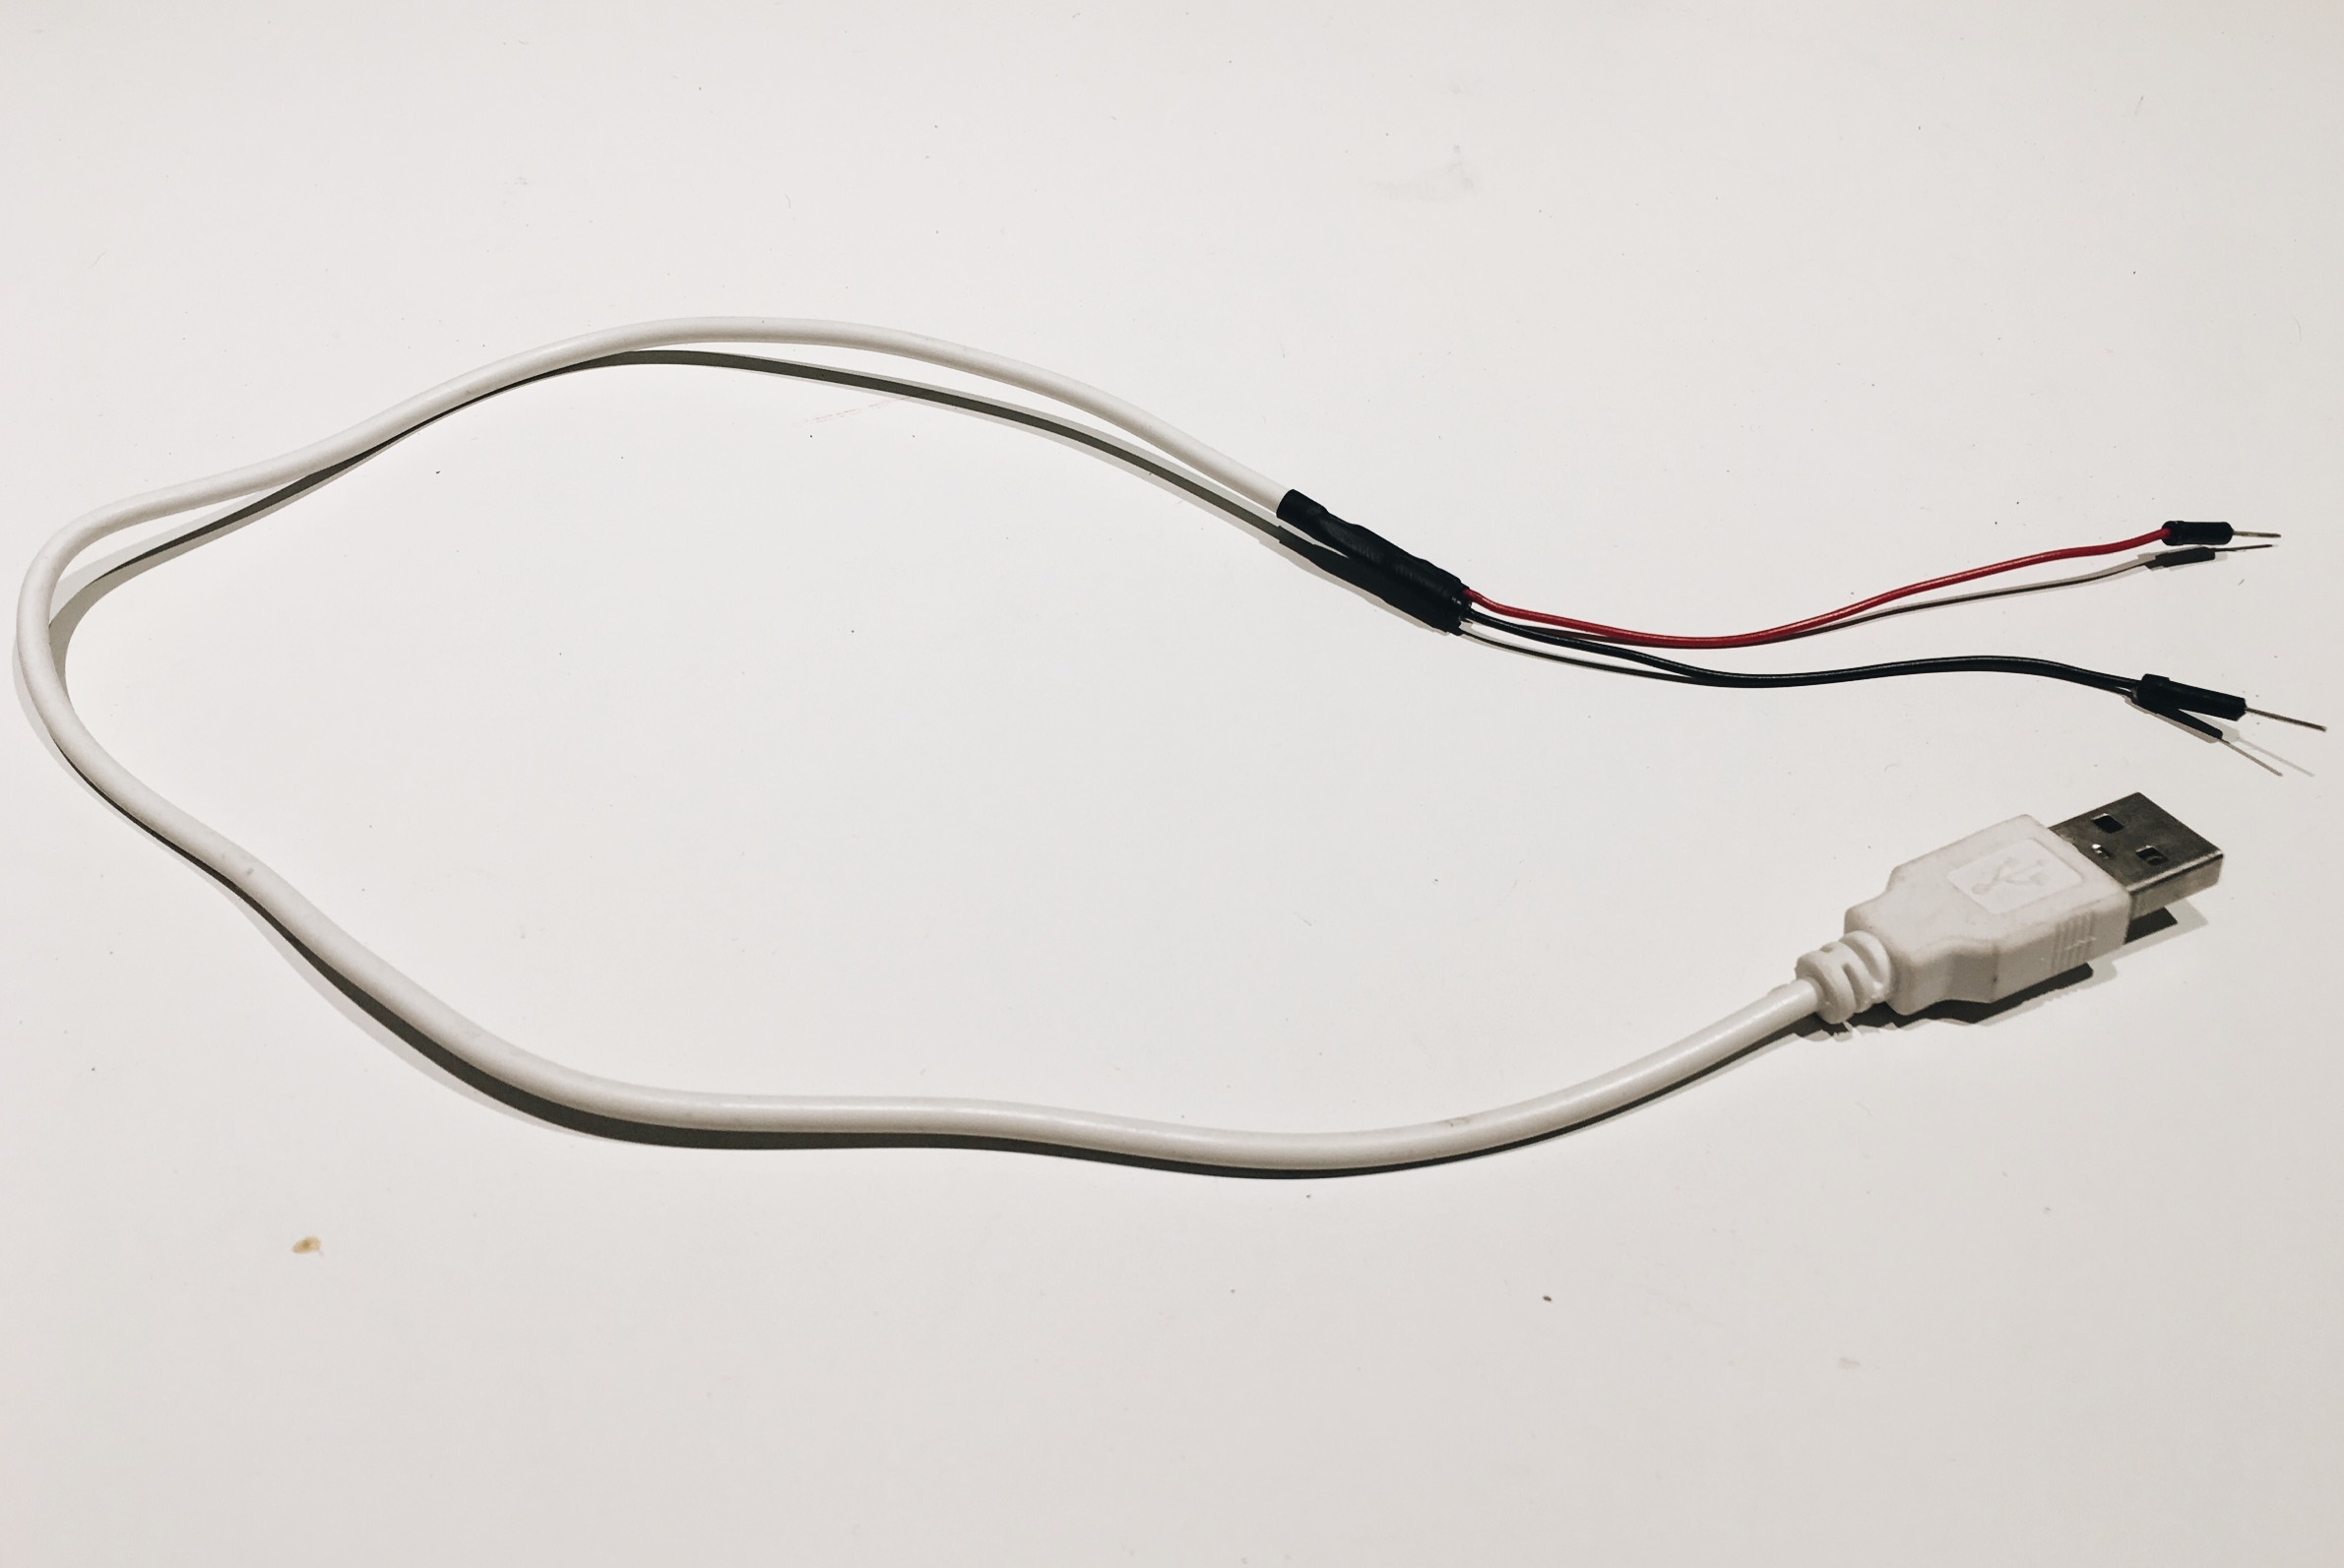
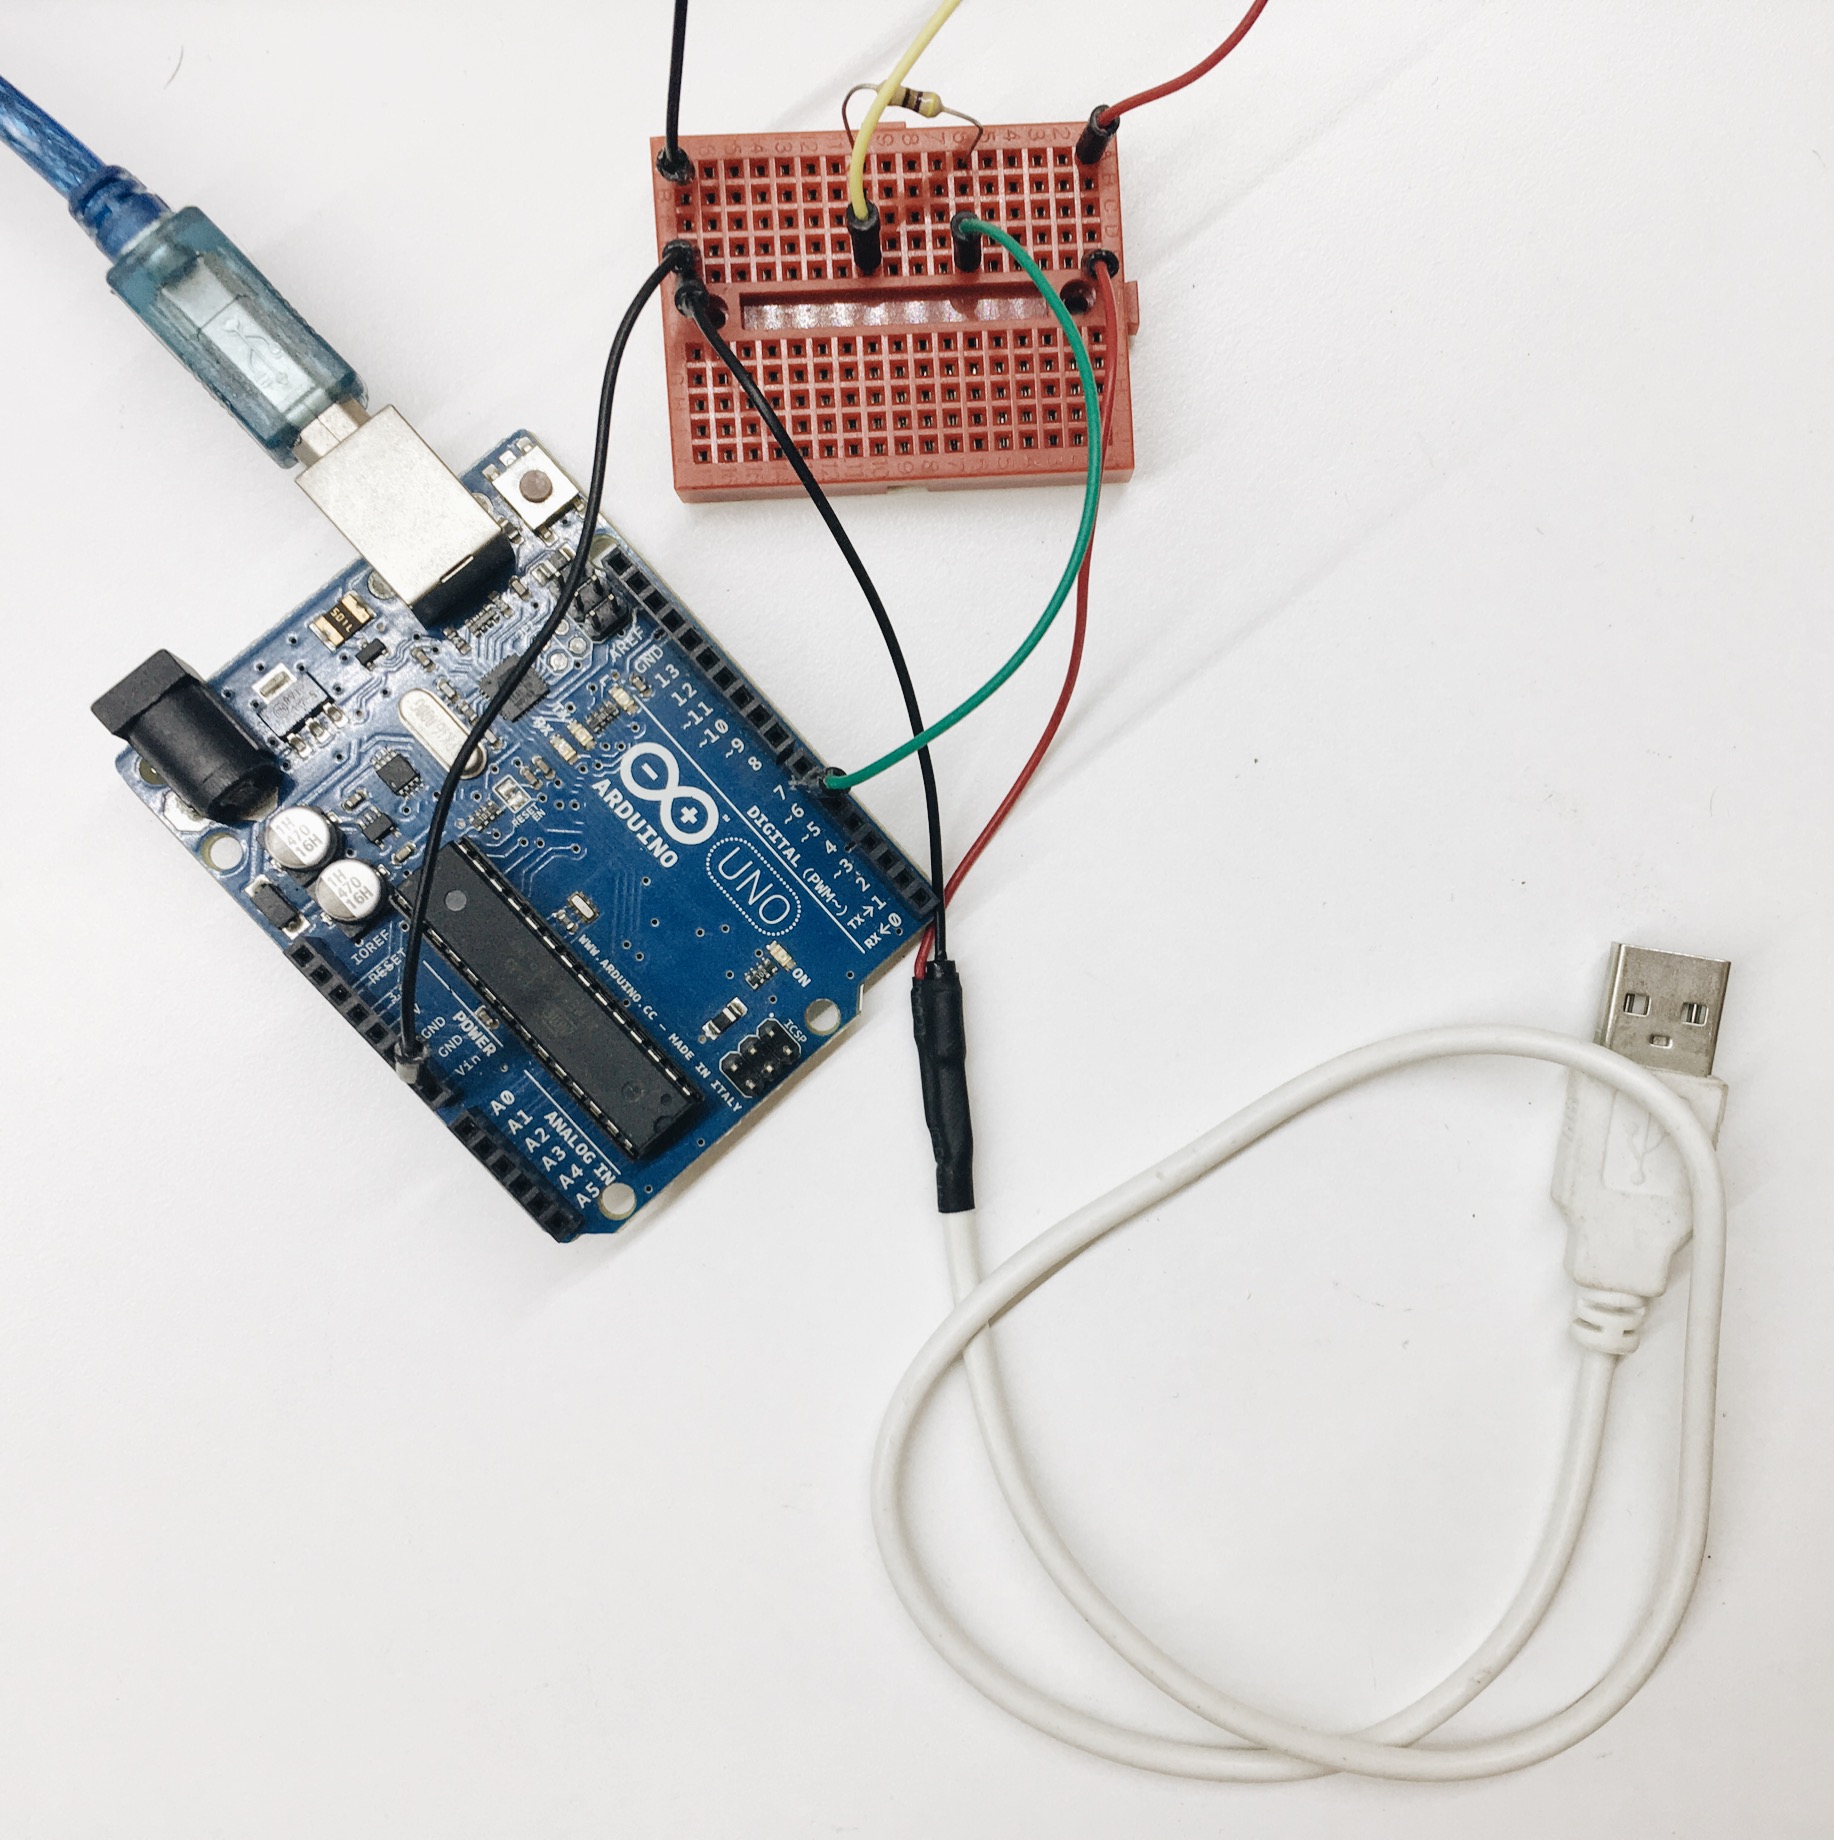
- Wire up with an Arduino's digital pin
PIN 6,470Ωresistor and1000uFcapacitor.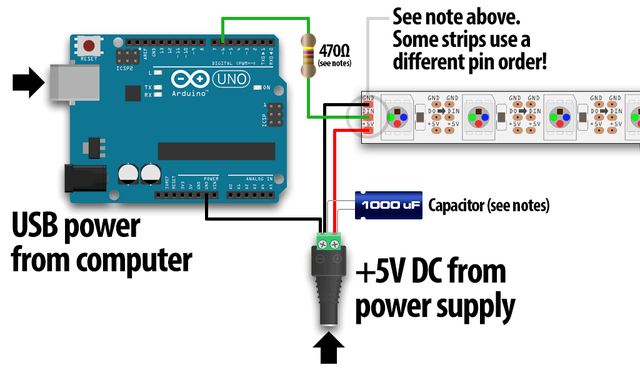 Source: Adafruit Neopixel Uberguide - basic connectors
Blinky with Arduino
- Open up the Arduino IDE
- Install Adafruit's Neopixel library from
Sketch > Include Library > Manage Library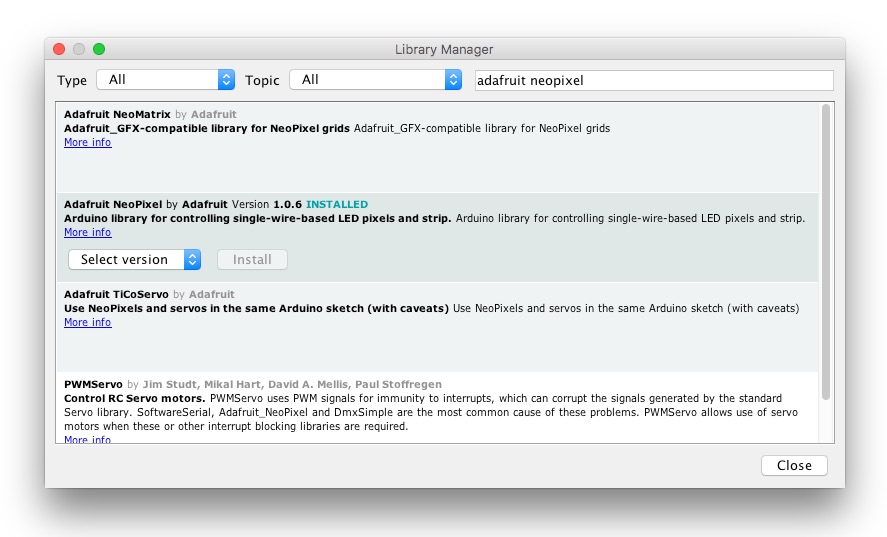
- Create new
neopixelproject withneopixel.inofile - Write some code to blink the
LED10andLED11every 1 second in red color
  #include <Adafruit_NeoPixel.h>

  #define PIN 6 // Arduino's PIN 6
  #define N_LEDS 60 // 60 pixel

  Adafruit_NeoPixel strip = Adafruit_NeoPixel(N_LEDS, PIN, NEO_GRB + NEO_KHZ800);

  void setup() {
    strip.begin();
  }

  void loop() {
    // LED ON in red
    strip.setPixelColor(10, strip.Color(255, 0, 0));
    strip.setPixelColor(11, strip.Color(255, 0, 0));
    strip.show();
    delay(1000);

    // LED OFF
    strip.setPixelColor(10, 0);
    strip.setPixelColor(11, 0);
    strip.show();

    delay(1000);
  }
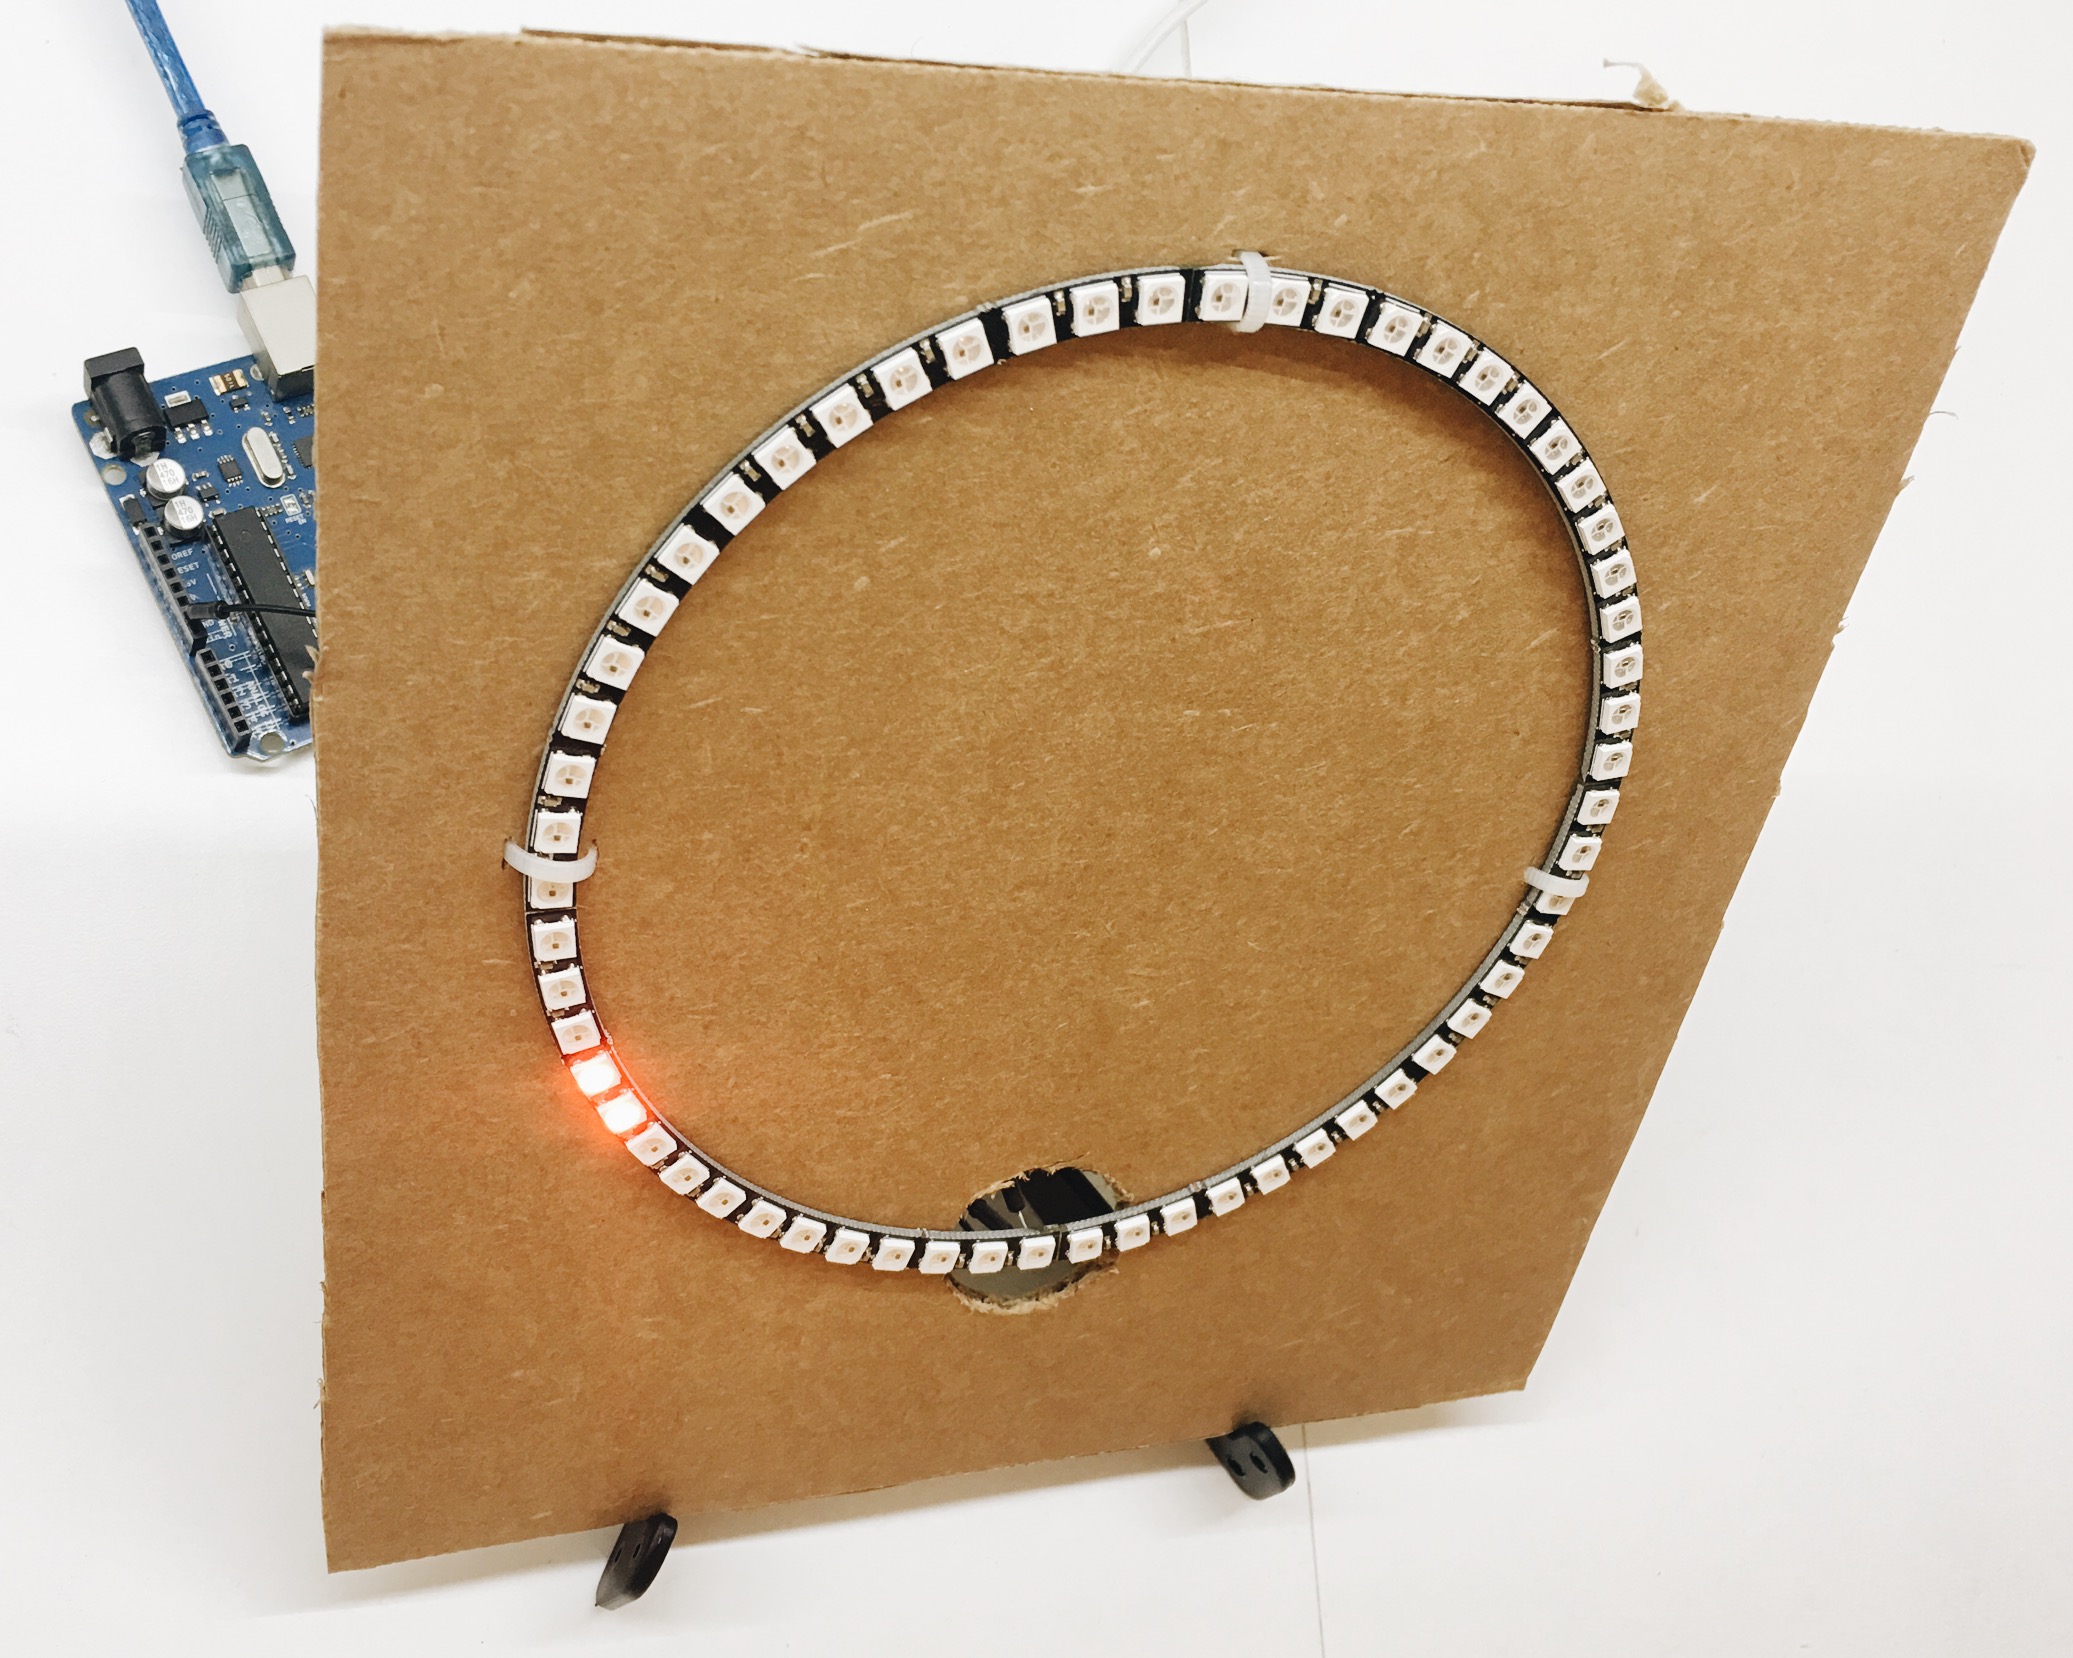
- Compile and upload to see the red led blinking every 1 second!
Control via the Web
Instead of using Arduino code, we will now flash firmata to the Arduino so that Johnny-Five JavaScript framework can talk to the Arduino. Using the same JavaScript code, we can also insert the code for a web server and serve an html page to control the LED light patterns.
- Install some node.js dependancies like express, johnny-five, neopixel and interchange
npm i express johnny-five node-pixel nodebots-interchange
- Ensure the Arduino is connected to your computer
- Flash the firmata to the Arduino using interchange
interchange install git+https://github.com/ajfisher/node-pixel -a uno --firmata
- Create a node.js file
index.js
  var five = require('johnny-five')
  var pixel = require('node-pixel')
  var express = require('express')
  var app = express()
  var board = new five.Board({
    port: process.argv[2] || ''
  })
  var strip = null
  var blinker

  app.use(express.static(__dirname))

  var server = app.listen(3000, function () {
    console.log(`Example app listening at http://localhost:${server.address().port}`)
  })

  board.on('ready', function() {
    strip = new pixel.Strip({
      data: 6,
      length: 60,
      color_order: pixel.COLOR_ORDER.GRB,
      board: this,
      controller: 'FIRMATA',
    })

    strip.on('ready', function() {
      strip.off()

      // add routes for different LED patterns
      // extend to add http routes...
    })
  })
- Extend
index.jsto add http routes for various LED controls
  app.get('/red', function(req, res) {
    clearTimeout(blinker)
    strip.color('#100')
    strip.show()
    res.redirect('/')
  })

  app.get('/green', function(req, res) {
    clearTimeout(blinker)
    strip.color('#010')
    strip.show()
    res.redirect('/')
  })

  app.get('/blue', function(req, res) {
    clearTimeout(blinker)
    strip.color('#001')
    strip.show()
    res.redirect('/')
  })

  app.get('/clear', function(req, res) {
    clearTimeout(blinker)
    strip.off()
    res.redirect('/')
  })

  app.get('/panel', function(req, res) {
    var colors = ['red', 'green', 'blue', "yellow", "cyan", "magenta", "white"]
    var current_colors = 0

    blinker = setInterval(function() {
      if (++current_colors >= colors.length) current_colors = 0
      strip.color(colors[current_colors])
      strip.show();
    }, 1000)

    res.redirect('/')
  })

  app.get('/breathe', function(req, res) {
    var color = 0
    var rising = true
    var max = 50
    var min = 0

    blinker = setInterval(function() {
      if (rising) {
        color++
        if (color >= max) {
          rising = false
          color = max
        }
      } else {
        color--
        if (color <= min) {
          rising = true
          color = min
        }
      }

      strip.color('rgba(' + color + ',' + color + ',' + color + ')')
      strip.show();
    }, 20)

    res.redirect('/')
  })
- Add
index.htmlin the same folder asindex.js
  <ul>
    <li><a href="/red">red</a></li>
    <li><a href="/green">green</a></li>
    <li><a href="/blue">blue</a></li>
    <li><a href="/clear">clear</a></li>
    <li><a href="/panel">panel</a></li>
    <li><a href="/breathe">breathe</a></li>
  </ul>
- Plug in the Arduino to the laptop, plug in the neopixel to USB power and start the node server
node index
- Visit the browser at
localhost:3000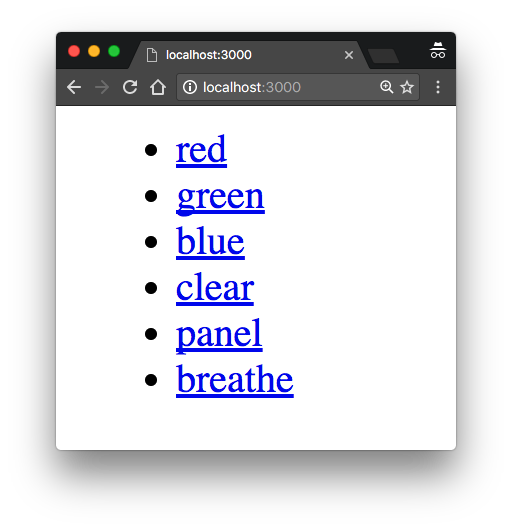
- Click the web controls and see the colors and patterns on the LED

This is just the simplest example case to get started with the Neopixel ring, but the combinations and patterns can be limitless!