02 Oct 2016 on web and iot
Beaglebone and Go
Running compiled Go on Beaglebone to interact with the GPIO pins
I have been busy learning 2 new things: Beaglebone, a single board computer and Go, a programming language. It was especially fun running a compiled Go script and playing with the GPIO pins of the Beaglebone. In this blog, I wanna share how to run a simple digital write with a blinky LED and read analog values from a potentiometer.
Pre-requisites
- Install Debian Linux for Beaglebone with an SD card.
- SSH into the Beaglebone with IP address
192.168.7.2 - Install Go programming language with
brew install goin your development machine (local machine) - Familiarise with the Beaglebone's GPIO pin layout
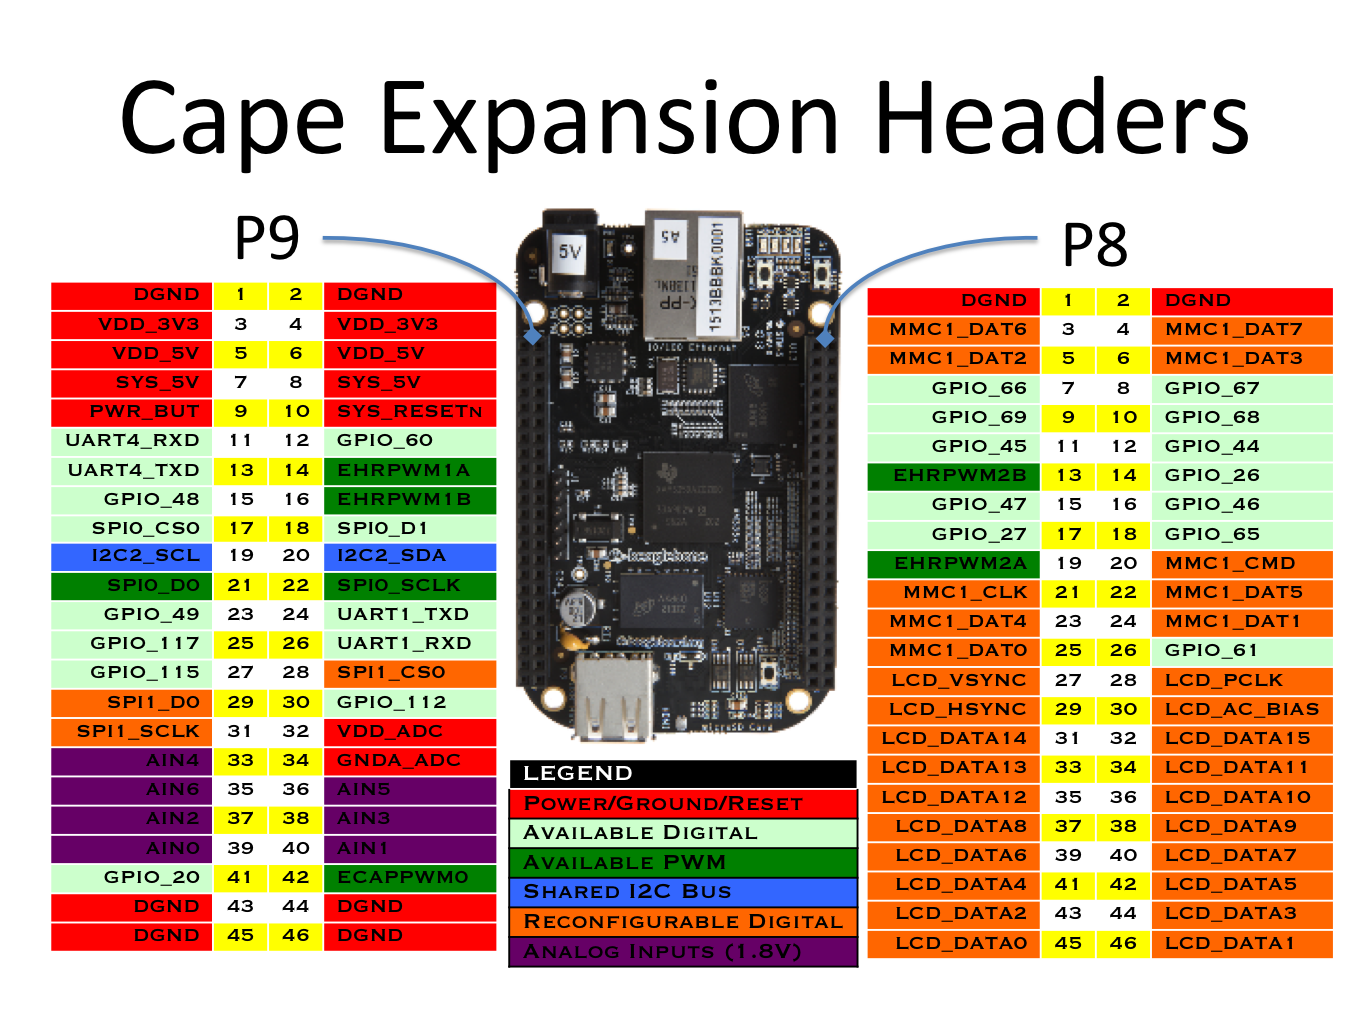 Source: Beaglebone.org
Digital write
- Wire up a super simple LED circuit with
1kΩresistor and Beaglebone'sP8 pin 2 DGNDandP8 pin 10 GPIO_68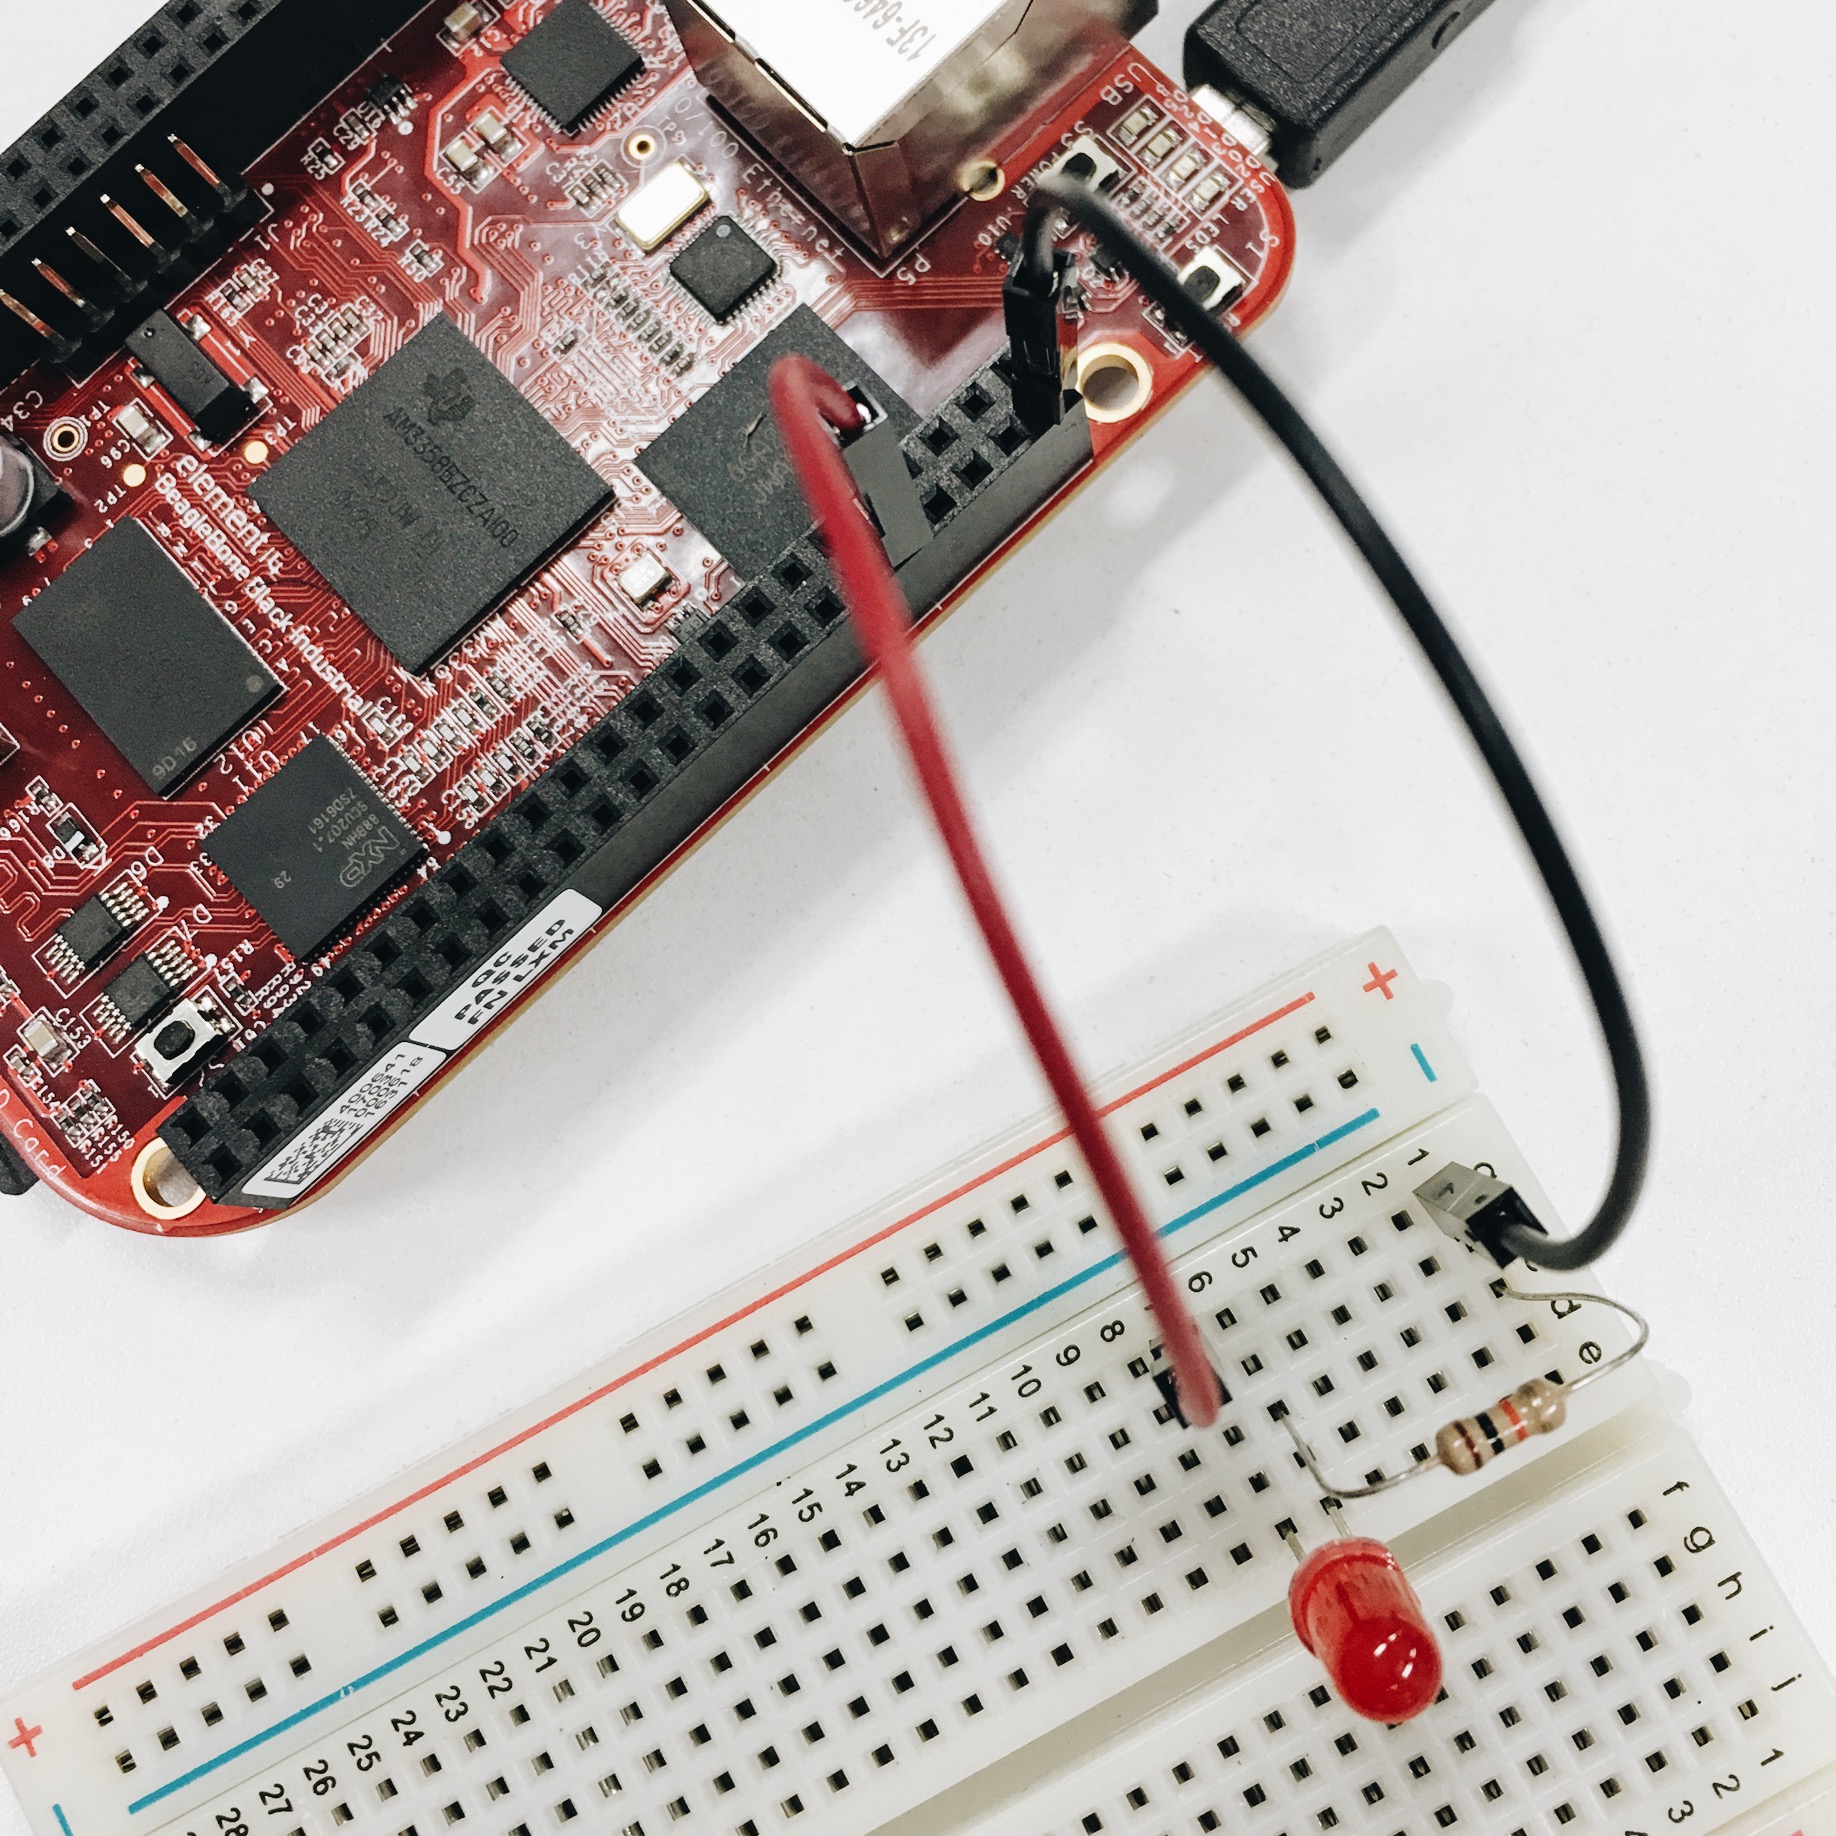
- SSH into the BBB with
ssh [email protected] - Turn on and off the LED in the command line with
  echo high > /sys/class/gpio/gpio68/direction # LED ON
  echo low > /sys/class/gpio/gpio68/direction # LED OFF
- Wondering what does Linux file systems's
/sysdo?
sysfs is a virtual file system provided by Linux. sysfs provides a set of virtual files by exporting information about various kernel subsystems, hardware devices and associated device drivers from the kernel's device model to user space.
- Write
highorlowto the/sys/classpin files to turn on and off the LED in Go programming language
  // blinky.go
  package main

  import "fmt"
  import "io/ioutil"
  import "time"

  func check(e error) {
    if e != nil {
      panic(e)
    }
  }

  func main() {
    var status bool = false
    high := []byte("high")
    low := []byte("low")
    var gpio string = "/sys/class/gpio/gpio68/direction"
    for range time.Tick(time.Second \*1) {
      if status {
        status = false
        err := ioutil.WriteFile(gpio, high, 0644)
        check(err)
        fmt.Println("high")
      } else {
        status = true
        err := ioutil.WriteFile(gpio, low, 0644)
        check(err)
        fmt.Println("low")
      }
    }
  }
- Compile on OSX for Beaglebone
GOARM=7 GOARCH=arm GOOS=linux go build blinky.go
- Transfer the executable file
blinkyvia ssh
scp blinky [email protected]:/root
- Run the binary
blinkyin Beaglebone and see the LED turn on and off 💥
./blinky
Analog read
- Wire up a potentiometer to
P9_32forVDD (1.8V),P9_34forGNDandP9_33for analog input pin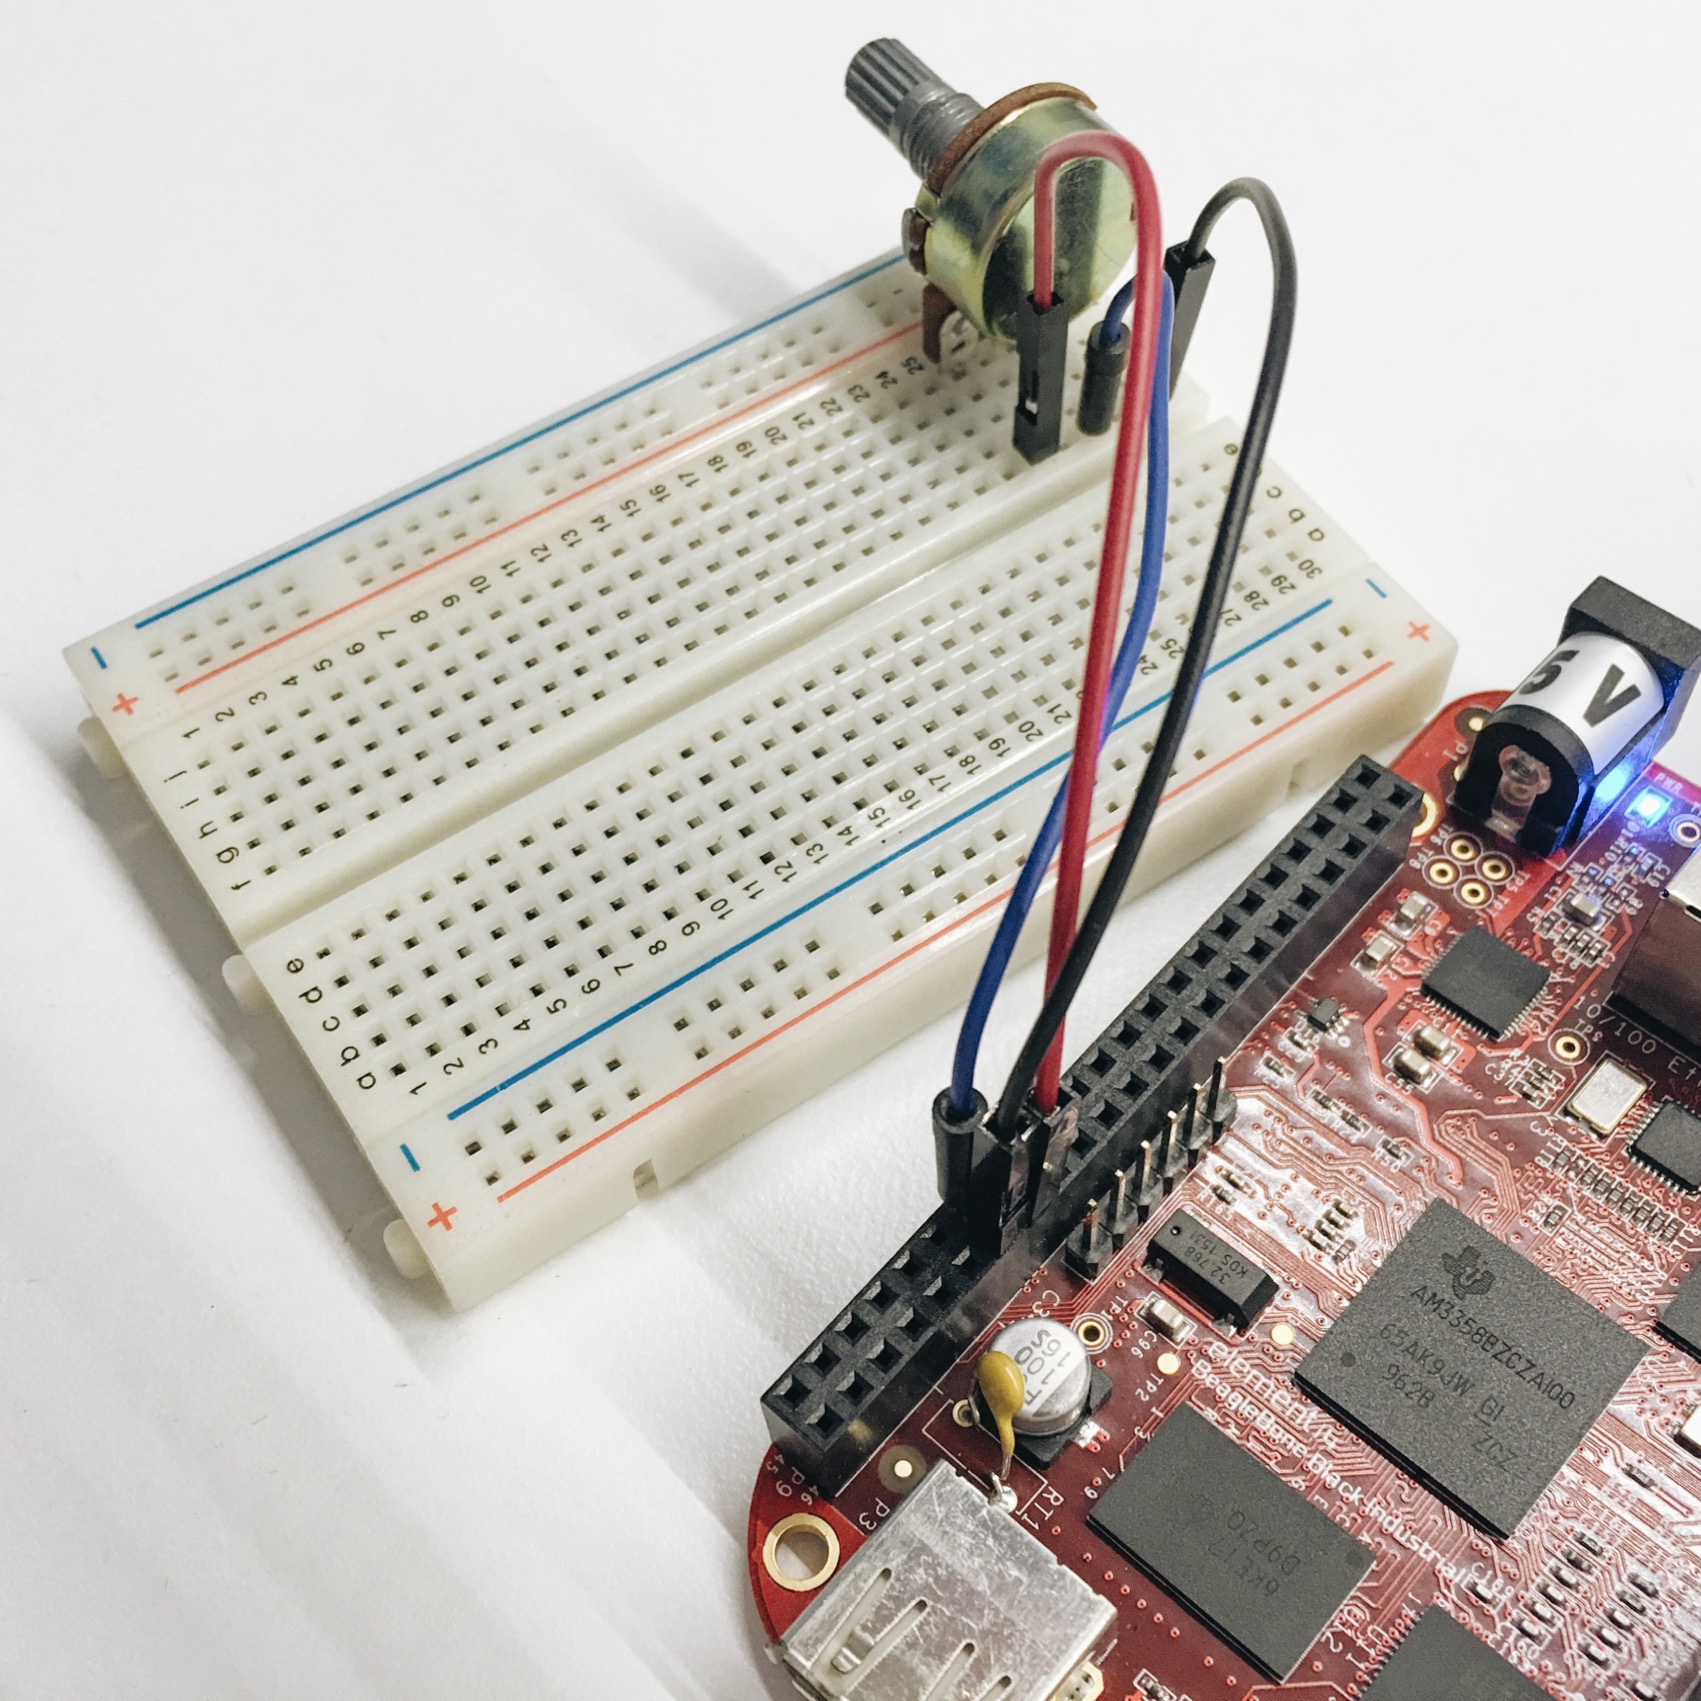
- SSH into the BBB with
ssh [email protected] - Setup the GPIO pins by adding the device
echo "BB-ADC" >> /sys/devices/platform/bone_capemgr/slots
- Turn the potentiometer knob and read the 12-bit ADC values from
0to4095
cat /sys/bus/iio/devices/iio:device0/in_voltage4_raw
- Read file to get the analog sensor values in Go
  // analogread.go
  package main

  import "fmt"
  import "io/ioutil"
  import "time"

  func check(e error) {
    if e != nil {
      panic(e)
    }
  }

  func main() {
    ticker := time.NewTicker(time.Millisecond * 500)
    var gpio string = "/sys/bus/iio/devices/iio:device0/in_voltage4_raw"

    go func() {
      for t := range ticker.C {
        b, err := ioutil.ReadFile(gpio)
        if err != nil {
          fmt.Print(err)
        }

        str := string(b)
        fmt.Println(str)
        fmt.Println("Tick at", t)
      }
    }()

    time.Sleep(time.Millisecond * 60000) // run for 1 minute
    ticker.Stop()
    fmt.Println("Ticker stopped")
  }
- Compile on OSX for Beaglebone
GOARM=7 GOARCH=arm GOOS=linux go build analogread.go
- Transfer the executable
analogreadvia SSH
scp analogread [email protected]:/root
- Run in Beaglebone
./analogread - Turn the potentiometer knob to see its ADC values change 💥
Conclusion
As one of the feature of Unix, Everything is a file, it was fun to read or write to extract the values and interact with simple sensors and the Beaglebone. And because we are running the digital write and analog read programs on Linux, we can also use other programming language frameworks like Adafruit's Beaglebone IO Python library or Bonescript with Node.js.